Step-by-Step KDP Formatting: How to Make Your Book Look Professional
KDP BasicsJanuary 07, 2026•18 min read
Table of Contents
—
Understanding the Importance of Professional KDP Formatting
Your manuscript might contain a bestseller, but if the interior looks amateurish, readers will disengage before finishing the first chapter. Formatting is the invisible art of book design; when done correctly, the reader doesn’t notice it. When done poorly, it becomes the only thing they see.
Why Formatting Matters for Sales and Reviews
Professional formatting is a trust signal. Before a customer buys, they often use Amazon’s “Look Inside” feature. If they see erratic line spacing, broken paragraphs, or missing indentation, they perceive the content as low quality.
Furthermore, poor formatting is a primary driver of negative reviews. Readers are quick to leave 1-star ratings for books that are difficult to navigate or display poorly on their devices. Clean formatting prevents returns and ensures your reviews focus on your writing, not your layout.
The Difference Between eBook and Print Layouts
The biggest mistake new authors make is trying to force one file type to serve two different formats.
-
eBook (Reflowable): Kindle files are dynamic. The reader controls the font size, typeface, and background color. Therefore, eBooks do not have fixed page numbers or headers. The text “flows” to fit the screen size, whether it is a smartphone or a Kindle Paperwhite.
-
Print (Fixed Layout): Print books are static. You must design the page exactly as it will appear on paper. This involves strict attention to margins, page numbers, headers, and avoiding “widows and orphans” (single lines of text left at the top or bottom of a page).
Key Terminology Every Self-Published Author Needs to Know
To navigate the KDP dashboard successfully, you must master the industry vernacular:
-
Trim Size: The physical dimensions of your printed book (e.g., 6″ x 9″).
-
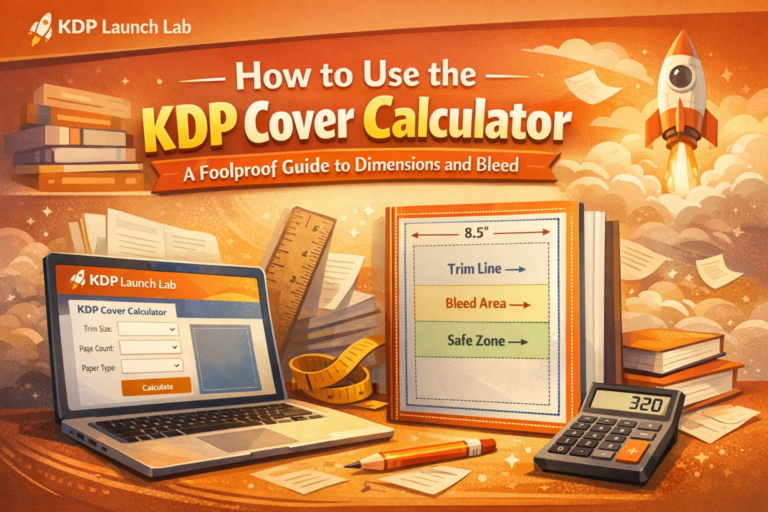
Bleed: When images or backgrounds extend to the very edge of the page. If your book has bleed, your PDF file dimensions must be slightly larger than the trim size to account for trimming during production.
-
Gutter: The inside margin of the book where the pages are glued to the spine. You must add extra space here so text doesn’t disappear into the binding.
-
Front Matter: Everything appearing before Chapter 1 (Title Page, Copyright, Table of Contents).
-
Back Matter: Content following the main text (Author Bio, CTA, References).
Preparing Your Manuscript for the Formatting Process
Before you import your file into formatting software like Vellum or Kindle Create, you must ensure the foundation is solid. Formatting relies on the principle of “garbage in, garbage out.” If your source document is riddled with hidden code and erratic spacing, your final book will suffer from conversion errors.
Cleaning Up Your Word Document: The Naked Manuscript
The first step is to strip away the “invisible” clutter. Turn on the Show/Hide (¶) button in Microsoft Word. This reveals the hidden formatting marks that software sees but you usually don’t.
Look for the following issues and eliminate them:
-
Tabs for Indents: Never use the Tab key to indent paragraphs. This causes alignment nightmares on e-readers. Delete them all.
-
Manual Line Breaks: Do not press “Enter” repeatedly to move text to the next page. Instead, insert a proper Page Break (Ctrl+Enter).
-
Double Spaces: Use “Find and Replace” to change all double spaces after periods to single spaces.
For a truly clean slate, consider copying your entire manuscript into a text editor (like Notepad) to strip all rich formatting, then pasting it back into a fresh Word document. This is the “nuclear option” for removing stubborn code.
Standardizing Font Styles and Paragraph Settings
Professional formatting relies on the Styles Pane, not manual overrides. Do not highlight text and manually change the font size or make it bold. instead, assign a specific Style (e.g., “Heading 1,” “Normal,” “Block Quote”).
-
Body Text: Set your “Normal” style to a standard font like Times New Roman or Garamond, 12pt.
-
Paragraph Indentation: Modify the “Normal” paragraph style to have a First Line Indent (usually 0.2″ to 0.3″). Do not use the default 0.5″, which looks too deep on mobile devices.
-
Spacing: Ensure your line spacing is consistent (usually 1.15 or 1.2 for readability).
Managing Hyperlinks and Internal References
Broken links trigger quality alerts from Amazon. Check every URL manually to ensure it directs to a live, secure (HTTPS) site.
-
For eBooks: Use embedded hyperlinks (anchor text) so readers can click directly.
-
For Print: You must write out the full URL (e.g., www.yoursite.com/bonus) or use a QR code, as paper isn’t clickable.
Finally, avoid static internal references like “See page 45.” In a reflowable eBook, page numbers do not exist. Instead, use relative references like “See Chapter 3” and use Word’s Cross-reference feature or Bookmarks to link internally within the document.
Mastering Kindle eBook Formatting: Reflowable Text
Unlike a PDF or a physical book, a Kindle eBook uses reflowable text. This means your content is treated like water; it is poured into the “container” of the reader’s device, adapting to different screen sizes and user-selected font settings. To ensure your book looks professional on a smartphone, a Kindle Paperwhite, and an iPad alike, you must strip away rigid formatting and embrace flexible design principles.
Creating a Clickable Table of Contents (TOC)
In an eBook, page numbers are irrelevant because pagination changes based on the user’s font size. Instead, your primary navigation tool is a hyperlinked Table of Contents (TOC). KDP uses this to generate the NCX (Navigation Control File for XML), which allows readers to jump between chapters using the Kindle menu.
To create a functional TOC in Microsoft Word or Google Docs:
-
Use Styles: Apply the Heading 1 style to all chapter titles. Do not manually increase the font size or use bolding; use the “Styles” pane.
-
Generate the TOC: Go to the “References” tab (Word) or “Insert” menu (Docs) and select the automatic Table of Contents.
-
Verify Links: Ensure the generated list is clickable. If you manually type your TOC, the hyperlinks will fail, and KDP may flag your file for quality issues.
Optimizing Images for Kindle Devices
Images in eBooks present unique challenges. Because many Kindle e-readers use e-ink technology, your images must look crisp in both color (for tablets/phones) and grayscale (for e-readers).
-
Anchoring: Always set your image wrapping style to “In Line with Text.” If you use “Wrap Text” or let images float, they may drift to random locations or overlap text when the font size is adjusted.
-
Resolution and Size: Use high-resolution JPEGs (300 PPI), but be mindful of file size. Amazon charges a delivery fee based on file size for the 70% royalty option. Compress your images to balance quality with file weight.
-
Center Alignment: Center all images to ensure they look balanced regardless of the device width.
Dealing with Forced Page Breaks and Section Separators
The most common amateur mistake in eBook formatting is using the “Enter” key repeatedly to push text to the next page. This results in massive, ugly gaps on larger screens.
-
Hard Page Breaks: To start a new chapter, never use the “Enter” key. Instead, use the Insert > Page Break function (or Ctrl + Enter). This creates a hard code that tells the Kindle to start a fresh screen immediately.
-
Scene Separators: Do not rely on extra whitespace to indicate a scene change (time jumps or POV switches). Whitespace often disappears at the top or bottom of a screen. Instead, use a centered graphic or ornamental break (like three asterisks: ***) so the reader clearly recognizes the transition.
Leveraging Kindle Create for Enhanced Typesetting
For authors who want a polished look without learning HTML, Kindle Create is Amazon’s proprietary tool. Importing your formatted Word doc into Kindle Create converts it into a KPF file, which unlocks Enhanced Typesetting.
Enhanced Typesetting improves the reading experience with cleaner hyphenation, kerning (spacing between letters), and features like drop caps. It also ensures your text justifies evenly across the page (simulating a print look) and enables “Page Flip,” allowing readers to preview other pages without losing their place. While it limits your ability to edit the text later, it is the most reliable way to finalize a reflowable eBook for the KDP ecosystem.
Designing Professional Print Interiors: Paperback and Hardcover
While eBooks rely on flowable content that adapts to user settings, print design is static and unforgiving. The interior file you upload to KDP is exactly what your reader will hold in their hands. A professional print interior is not just about aesthetics; it is about readability and meeting industry standards. To transition from a manuscript to a physical product that rivals traditional publishing houses, you must master the mechanics of page layout.
Choosing the Right Trim Size for Your Genre
The trim size is the physical dimension of your book. Selecting the wrong size can immediately signal to a reader that the book is self-published. You must align your choice with genre standards:
-
Non-Fiction and Memoirs: The industry standard is generally 6″ x 9″ (15.24 x 22.86 cm). This size offers ample room for charts, diagrams, and comfortable text density.
-
Fiction (Trade Paperback): Common sizes include 5.5″ x 8.5″ or 5.25″ x 8″. These sizes are easier to hold in one hand.
-
Mass Market Feel: If you want a smaller, pocket-sized feel typical of thrillers or romance, 5″ x 8″ is acceptable, though less common for KDP Print-on-Demand due to spine width limitations on shorter books.
Once you select a trim size, you cannot change it without unpublishing and creating a new edition, so choose wisely before you begin formatting.
Understanding Bleed vs. No Bleed Settings
This setting tells KDP’s printers whether your content extends to the edge of the paper.
-
No Bleed: This is the standard for 99% of fiction and text-heavy non-fiction. All text and images are contained within the margins, leaving a consistent white border around the page.
Bleed: Select this if you have images, backgrounds, or charts that extend to the very edge of the page without a white border.
Crucial Technical Detail: If you select Bleed, you must increase your page size file by 0.125 inches (3.2 mm) on the outer edges. For example, a 6″ x 9″ book with bleed requires a PDF submission size of 6.125″ x 9.25″. Failure to add this extra space will result in white slivers appearing on the edges of your printed pages.
Calculating Margins and Gutters for Readability
Margins provide visual breathing room. If your text is too close to the edge, the reader’s thumbs will cover it; if it is too close to the spine, the text will disappear into the binding.
-
Outside Margins: Keep these at least 0.5″ to 0.75″ to ensure a clean look.
-
The Gutter (Inside Margin): This is the most critical calculation. The gutter is the extra margin space added to the inside edge (where pages are glued) to accommodate the page fold.
As your page count increases, your book gets thicker, and you need a wider gutter. KDP recommends the following minimum inside margins based on page count:
-
24–150 pages: 0.375″ (9.6 mm)
-
151–300 pages: 0.5″ (12.7 mm)
-
301–500 pages: 0.625″ (15.9 mm)
-
500+ pages: 0.75″ (19 mm)
Setting Up Professional Headers, Footers, and Page Numbers
Nothing screams “amateur” like page numbers on a title page or headers on the first page of a chapter. Professional formatting follows a strict hierarchy:
-
Front Matter: Pages like the Title Page, Copyright, and Dedication should generally be devoid of headers and visible page numbers. If numbered, they traditionally use lowercase Roman numerals (i, ii, iii).
-
Chapter Start Pages: The first page of a new chapter should never have a header. The page number is usually placed at the bottom center (footer) or omitted entirely on these pages.
-
Running Heads: For standard text pages, use “Running Heads.” The standard convention is:
-
Left Page (Verso): Author Name
-
Right Page (Recto): Book Title or Chapter Title
Ensure your page numbers are set to mirror margins so they always appear on the outer corners of the page, rather than getting trapped near the spine. Consistency here is key to a polished, high-end reading experience.
Advanced Interior Design Elements for a High-End Look
Basic formatting ensures your text is readable; advanced design ensures your book is memorable. To compete with traditional publishing houses, you must move beyond default settings and implement design elements that subconsciously signal quality to the reader. A high-end interior builds trust and enhances the immersive experience of your narrative.
Professional Typography and Font Pairing Strategies
Typography is the backbone of interior design. A common amateur mistake is using a single font family for the entire manuscript. For a professional look, utilize font pairing, contrasting two typefaces that complement each other.
-
Body Text: Always choose a serif font for print fiction and narrative non-fiction. Serifs (the small strokes at the end of letters) guide the eye along the line. Excellent industry-standard choices include Garamond, Caslon, or Minion Pro.
-
Headings and Titles: Contrast the body text with a clean sans-serif font (like Montserrat or Lato) or a genre-specific display font.
Ensure your leading (line spacing) is sufficient—usually 1.2 to 1.5 times the font size—to prevent the text block from looking dense and intimidating.
Using Drop Caps and Decorative Chapter Headers
Visual cues tell the reader a new section has begun. Drop caps (a large capital letter at the beginning of a chapter) serve as an elegant entry point. Standard professional formatting usually drops the letter two or three lines deep. Ensure the bottom of the drop cap aligns perfectly with the baseline of the adjacent text.
For chapter headers, consider adding a grayscale graphic or a stylized flourish that separates the chapter title from the body text. If using images for paperback or hardcover, ensure they are 300 DPI to avoid pixelation. For eBooks, keep these graphics simple and file sizes small to avoid delivery fee surcharges on KDP.
Formatting Essential Front Matter: Copyright and Dedication
The front matter sets the tone before the story begins.
-
Copyright Page: This should be on the verso (left-hand) page. Keep it organized with your ISBN, rights statement, and disclaimers.
-
Dedication: Less is more. Center your dedication, but not geometrically; place it slightly above the visual center of the page. Use plenty of negative space (white space) to give the words weight and emotional resonance.
Formatting Back Matter: About the Author and Calls to Action
Your back matter is your most valuable marketing real estate. Do not leave it blank.
-
About the Author: Include a professional, high-contrast headshot and a bio written in the third person. Focus on your expertise or connection to the genre.
-
Calls to Action (CTA): Directly ask the reader to leave a review or sign up for your newsletter. For eBooks, use direct hyperlinks to your signup page. For print, use short, clean URLs (e.g., yourdomain.com/free) that are easy to type.
By polishing these elements, you transform a manuscript into a product that stands shoulder-to-shoulder with bestsellers.
Top Software Tools for KDP Manuscript Formatting
Choosing the right software is just as critical as the formatting process itself. The tool you select dictates your workflow, your learning curve, and ultimately, the visual quality of your final product. Whether you are a DIY author on a budget or a publisher seeking pixel-perfect design, here are the industry-standard tools for the job.
Using Microsoft Word for Professional Formatting
Most authors write in Microsoft Word, making it the most accessible tool for formatting. However, successful KDP formatting in Word requires strict adherence to Styles. You cannot format manually; using the spacebar to center text or the “Enter” key to create page breaks will result in a broken Kindle eBook.
-
Best for: Text-heavy fiction and simple non-fiction.
-
Key Action: Utilize the Styles Pane to tag your Headings (H1, H2) and Body Text. This ensures Amazon’s conversion algorithm recognizes your chapter breaks and Table of Contents automatically.
Designing with Vellum and Atticus for Mac and PC
For authors who want beautiful interiors without learning graphic design, Vellum (Mac only) and Atticus (PC, Mac, Linux) are the leading solutions. These tools function as dedicated book formatting software, allowing you to import a clean Word doc and export print-ready PDFs and reflowable EPUBs instantly.
-
*Best for: Authors who value speed and aesthetics over granular control.
-
Key Action: Use these tools to preview how your book looks across different devices (Kindle, iPad, Phone) in real-time before exporting. Atticus is often called the “Vellum for PC” and is a cost-effective, browser-based alternative.
Professional Layouts with Adobe InDesign
Adobe InDesign is the gold standard for traditional publishing. It offers total control over typography, including kerning, leading, and widow/orphan control. Unlike Word or Vellum, InDesign is a page-layout tool, not a word processor.
-
Best for: Image-heavy books, cookbooks, children’s books, or complex non-fiction requiring sidebars and footnotes.
-
Key Action: Use InDesign to manage CMYK color profiles for print and precise bleed settings for full-page images, ensuring your physical book looks indistinguishable from a Big 5 publication.
Free Options: Kindle Create and Google Docs
If premium software isn’t in the budget, Amazon provides Kindle Create. This free tool polishes a finished Word doc, adding flourishes like drop caps and theme elements, then exports a KPF file for upload. Alternatively, Google Docs creates surprisingly clean code for eBooks.
-
Best for: Authors with $0 budget or those intimidated by complex software.
-
Key Action: If using Google Docs, download your file specifically as an EPUB Publication (.epub) rather than a PDF to ensure the text flows correctly on e-readers.
Common KDP Formatting Mistakes to Avoid
Even with the best software tools, minor oversight can trigger KDP’s automated file rejection or, worse, result in a negative reader experience. To ensure your book passes the review process smoothly, pay close attention to these frequent formatting pitfalls.
Incorrect Page Numbering and Mirror Margin Errors
Nothing screams “amateur” louder than page numbers appearing on the spine-side of a page. In professional typesetting, odd-numbered pages must always appear on the right (recto), while even numbers fall on the left (verso). Ensure your formatting software is set to place page numbers on the “outside” edge.
Furthermore, failing to set Mirror Margins leads to text disappearing into the book’s binding. You must account for the Gutter, extra white space added to the inside margin. As your page count increases, the gutter must get wider to accommodate the glue and fold of the spine.
Low-Resolution Images and Cover Bleed Issues
Images that look crisp on a computer screen often look pixelated in print. Screens only require 72 DPI (dots per inch), but KDP print demands a minimum of 300 DPI. Always check your image properties before inserting them into your manuscript; scaling a low-res image up will simply make it blurry.
regarding covers, a common error is failing to account for bleed. If your cover art is intended to go all the way to the edge of the paper, the image must extend 0.125 inches (3.2 mm) beyond the trim line on all sides. If you skip this, Amazon may reject the file or print a thin, unprofessional white strip along the edge of your book.
Font Embedding Errors and Character Encoding Problems
When exporting your print PDF, you must ensure all fonts are fully embedded. If a font is not embedded, the KDP printer machines will substitute your custom typeface with a default font (usually something unattractive like Courier or Times New Roman), completely destroying your interior design.
Additionally, watch for character encoding issues. This often happens when copy-pasting text from the web or different word processors. Special characters like curly quotes, em-dashes, or foreign accents, may turn into rectangular boxes or “gibberish” symbols. Always review your final PDF page-by-page to ensure all glyphs render correctly.
Quality Control: Previewing and Validating Your Files
Formatting is never truly finished until it passes rigorous quality control. A file may look perfect in your word processor but break completely when converted to KDP’s proprietary formats. To protect your reputation and avoid negative reviews regarding “unreadable text,” you must validate your files across multiple environments.
Navigating the KDP Online Previewer
Your first line of defense is the KDP Online Previewer, located on the “Paperback Content” or “Kindle eBook Content” tab of your dashboard. Once your files are uploaded, launch the previewer to run an automated check. Pay close attention to the Quality Check sidebar, which automatically flags issues like low-resolution images (under 300 DPI) or text extending beyond the safety margins. Manually click through every page of your front matter and the first three chapters to ensure headers, page numbers, and scene breaks render correctly.
Testing Your eBook on Kindle Apps and Devices
The online previewer is a simulation, not a guarantee. For eBooks, download Amazon’s free Kindle Previewer 3 desktop application. This tool mimics how your book behaves on different screen sizes, from smartphones to large tablets. For the ultimate test, use the “Send to Kindle” feature to email your EPUB file directly to your own Kindle device or smartphone app. This “sideloading” process reveals navigation glitches and user experience issues, such as hyperlinks not working or indented paragraphs looking messy, that emulators often miss.
Ordering and Reviewing Physical Proof Copies
Digital previews cannot replicate the tactile experience of a printed book. Before clicking “Publish,” order a physical proof copy. While this copy will have a “Not for Resale” watermark, it is essential for verifying spine alignment, cover color fidelity, and paper quality. Open the book flat to ensure your gutter margins are wide enough so text doesn’t disappear into the binding. If the physical book feels professional in your hands, it is finally ready for your readers.
kdp formattingbook designebook formattingmanuscript preparationkdp manuscript formatting guidebook layout
Michael Osborne
Michael Osborne is the creator of KDP Launch Lab, where he teaches simple, practical publishing systems for low content, public domain, and high content books.
Back to Blog